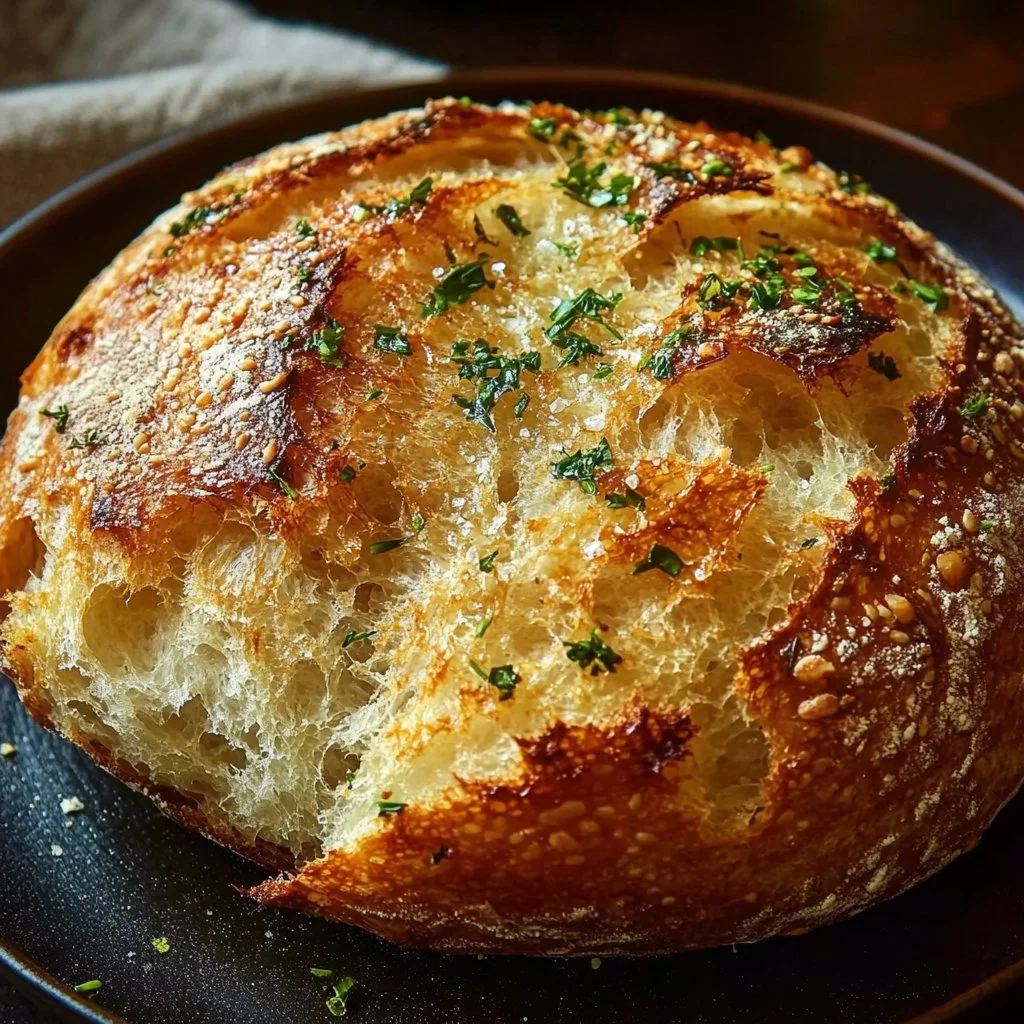
Garlic Herb Dutch Oven Bread
Garlic Herb Dutch Oven Bread is an indulgent delight that fills your kitchen with a warm, inviting aroma that enchants your senses. This homemade bread has a crispy, crusty exterior that gives way to a soft, chewy interior, each bite bursting with the flavor of garlic and fresh herbs. Easy to make and absolutely satisfying, this recipe offers a rustic charm that makes it an essential addition to your cooking repertoire.
Making homemade bread can seem daunting, but with a step-by-step guide, you’ll soon master the art of baking. Perfect for gatherings, family dinners, or just satisfying your cravings, this Garlic Herb Dutch Oven Bread is worth every minute spent in the kitchen.
Why You’ll Love This Recipe
This Garlic Herb Dutch Oven Bread boasts several incredible benefits that will make it your go-to bread recipe. First, the prep time is minimal, making it suitable for busy weeknights or leisurely weekends. With only a handful of ingredients, you can whip up something wonderful without the fuss!
It’s also family-friendly; everyone will adore the unique flavors – even those who may not be avid bread lovers! Plus, the dough requires minimal hands-on time, allowing you to attend to other tasks while it rises. You won’t believe how easy it is to create perfect artisan bread right at home!
Ingredients for Garlic Herb Dutch Oven Bread
For this Garlic Herb Dutch Oven Bread, you’ll need the following ingredients, each adding depth and flavor to your final dish:
- 3 cups all-purpose flour: The base of your bread, giving it a lovely structure.
- 1 1/4 teaspoons salt: Enhances the flavor and controls fermentation.
- 1/2 teaspoon instant yeast: Helps the bread rise without a lengthy wait.
- 1 1/2 cups warm water (about 110°F): Activates the yeast and hydrates the flour.
- 3 tablespoons olive oil: Adds richness and moisture.
- 4 cloves garlic, minced: Infuses a bold, aromatic flavor.
- 1 tablespoon fresh rosemary, chopped: Provides a fragrant and earthy note.
- 1 tablespoon fresh thyme, chopped: Adds a slightly minty, lemony essence.
- 1 tablespoon fresh parsley, chopped: Lifts the flavors with a fresh brightness.
- Additional flour for dusting: Aids in preventing sticking when shaping the dough.
Step-by-Step Directions for Garlic Herb Dutch Oven Bread
In a large mixing bowl, combine the all-purpose flour, salt, and instant yeast. Stir until well mixed, ensuring the yeast is evenly distributed.
In a separate bowl, combine the warm water, minced garlic, olive oil, and chopped herbs (rosemary, thyme, and parsley). Mix well until all ingredients are combined and the garlic is evenly dispersed.
Pour the wet mixture into the dry ingredients. Stir with a wooden spoon or use your hands until a shaggy dough forms. The dough will be sticky and wet – this is a good sign!
Cover the bowl with plastic wrap or a clean kitchen towel. Let it rest at room temperature for 12 to 18 hours or until the surface is bubbly and the dough has approximately doubled in size.
Once the dough has risen, sprinkle a work surface with flour and carefully turn out the dough onto the floured surface. With floured hands, gently shape the dough into a round loaf. Avoid kneading too much to maintain its airy texture.
Dust the top of the loaf with a little more flour and cover it with a kitchen towel. Allow it to rest for another 1 to 2 hours until it has puffed up slightly.
About 30 minutes before baking, place a Dutch oven (with the lid) into the oven and preheat it to 450°F (230°C).
Once preheated, carefully remove the Dutch oven from the oven. Remove the lid and gently place the bread loaf inside, then cover it with the lid again.
Bake the bread for 30 minutes with the lid on, then carefully remove the lid and bake for an additional 15 to 20 minutes, or until the bread is golden brown and crusty on the outside.
Once done, transfer the bread to a wire rack to cool before slicing. Enjoy your warm Garlic Herb Dutch Oven Bread fresh out of the oven!
Tips & Tricks
Here are some chef’s secrets and cooking hacks for the best Garlic Herb Dutch Oven Bread:
- Use Fresh Herbs: For the best flavor, always use fresh herbs instead of dried ones; they impart a vibrant taste and aroma.
- Temperature Matters: Ensure your water is at the right temperature to activate the yeast effectively – too hot can kill the yeast, while too cold will not activate it.
- Let the Dough Rest: Don’t rush the rising time. Allowing it to slowly ferment develops a deeper flavor and a better texture.
- Baking with Steam: Using a Dutch oven traps steam, creating a beautifully crusty exterior, so it’s essential to keep the lid on during the first phase of baking.
Serving Suggestions & Pairings
Garlic Herb Dutch Oven Bread pairs beautifully with a wide variety of dishes. Here are some creative ideas for presenting and enjoying this delightful bread:
- With Olive Oil & Balsamic Vinegar: Serve alongside a small dish of high-quality olive oil and balsamic vinegar for dipping. This simple yet elegant pairing enhances the bread’s flavors.
- Cheese & Charcuterie Board: Incorporate your bread into a cheese and charcuterie platter for additional texture and taste complementing cured meats and artisanal cheeses.
- Soup and Stews: Enjoy your freshly baked bread as a side to hearty soups or stews. The crusty outer layer is perfect for dipping, soaking up every flavorful drop.
- Salads: Use slices as croutons in your salads; the garlic and herb flavors elevate even the simplest green mix.
Nutritional Information
While enjoying delicious Garlic Herb Dutch Oven Bread, it’s good to be aware of its nutritional information. This bread is rich in carbohydrates, potentially providing you with energy for your day-to-day activities.
One serving can contain approximately:
- Calories: 150 per slice
- Carbohydrates: 31g
- Protein: 4g
- Fat: 2g
Remember, moderation is key, especially if indulging in more than one slice!
Storing Tips & Variations for Garlic Herb Dutch Oven Bread
Want to keep some of your Garlic Herb Dutch Oven Bread for later? Here are some storing tips and variations:
- Freeze it: Wrap slices in plastic wrap or place them in a sealed freezer bag before freezing. They can last up to three months!
- Reheat: To enjoy, reheat the frozen slice in the oven for a crispy crust, or microwave it for a softer effect.
- Healthier Swaps: Consider using whole wheat flour or a gluten-free flour mix to cater to dietary preferences.
- Flavor Variants: Experiment with different spices and herbs, such as basil or oregano, or add grated cheese into the dough for extra flavor.
Conclusion for Garlic Herb Dutch Oven Bread
Now that you have this Garlic Herb Dutch Oven Bread recipe at your fingertips, why wait? Dive into the world of home-baked bread, feel the satisfaction of creating something delicious from scratch, and enjoy its warmth with family or friends. This recipe is a delightful way to elevate your culinary skills and impress your loved ones. Make it today and relish the experience!
FAQs
1. Can I use a standing mixer to make the dough?
Absolutely! A standing mixer fitted with a dough hook can save you some elbow grease.
2. What if I don’t have a Dutch oven?
You can bake the bread on a baking sheet or a cast-iron skillet, but keep in mind that you might not achieve the same crustiness.
3. How do I know when the bread is done baking?
The bread should be golden brown on top and sound hollow when tapped on the bottom.
4. Can I add other ingredients like cheese or olives?
Definitely! Feel free to experiment and add your favorite mix-ins to customize your bread.
5. How long can I keep this bread?
Stored in a sealed container at room temperature, your Garlic Herb Dutch Oven Bread can stay fresh for up to three days. For longer storage, freezing is recommended.
Now it’s your turn to unleash your inner baker! Enjoy every bite of your creation.
Print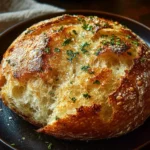
Garlic Herb Dutch Oven Bread
- Total Time: 60 minutes
- Yield: 12 servings 1x
- Diet: Vegetarian
Description
A homemade bread with a crispy exterior and soft, chewy interior, enhanced with garlic and fresh herbs.
Ingredients
- 3 cups all-purpose flour
- 1 1/4 teaspoons salt
- 1/2 teaspoon instant yeast
- 1 1/2 cups warm water (about 110°F)
- 3 tablespoons olive oil
- 4 cloves garlic, minced
- 1 tablespoon fresh rosemary, chopped
- 1 tablespoon fresh thyme, chopped
- 1 tablespoon fresh parsley, chopped
- Additional flour for dusting
Instructions
- In a large mixing bowl, combine the all-purpose flour, salt, and instant yeast. Stir until well mixed.
- In a separate bowl, combine the warm water, minced garlic, olive oil, and chopped herbs. Mix until combined.
- Pour the wet mixture into the dry ingredients and stir until a shaggy dough forms.
- Cover the bowl with plastic wrap or a towel and let it rest for 12 to 18 hours.
- Once risen, turn out the dough onto a floured surface and shape it into a round loaf.
- Dust the loaf with more flour, cover with a towel, and let it rest for 1 to 2 hours.
- Preheat a Dutch oven in the oven at 450°F (230°C) for 30 minutes.
- Remove the Dutch oven, place the bread loaf inside, cover with the lid, and bake for 30 minutes.
- Remove the lid and bake for an additional 15 to 20 minutes until golden brown.
- Transfer to a wire rack to cool before slicing.
Notes
For the best flavor, use fresh herbs and ensure the water temperature is neither too hot nor too cold to activate the yeast effectively.
- Prep Time: 15 minutes
- Cook Time: 45 minutes
- Category: Bread
- Method: Baking
- Cuisine: American
Nutrition
- Serving Size: 1 slice
- Calories: 150
- Sugar: 0g
- Sodium: 295mg
- Fat: 2g
- Saturated Fat: 0g
- Unsaturated Fat: 2g
- Trans Fat: 0g
- Carbohydrates: 31g
- Fiber: 1g
- Protein: 4g
- Cholesterol: 0mg