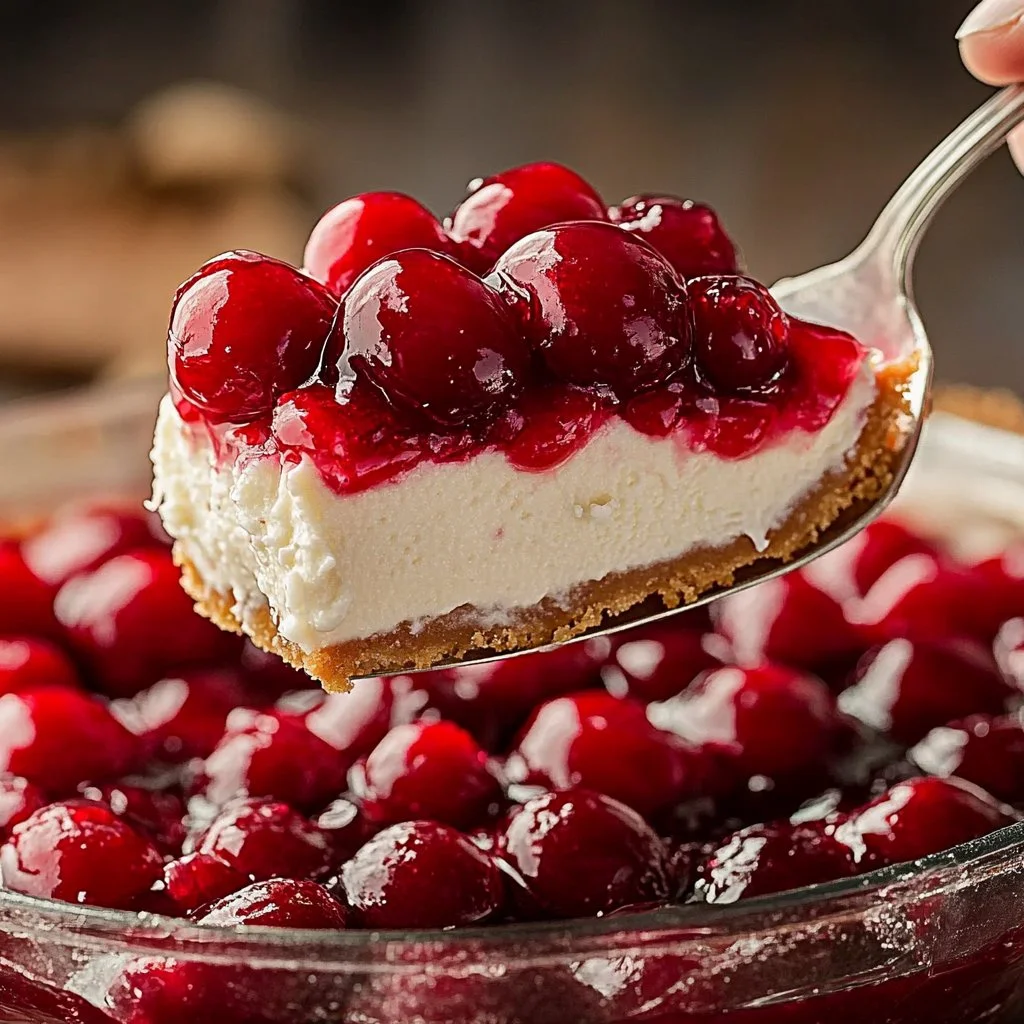
Vintage Cherries In the Snow
There’s something undeniably enchanting about Vintage Cherries In the Snow. This delightful dessert not only tantalizes your taste buds but also whisks you away to a world where sweet and creamy textures intertwine with the joyful essence of cherries. With its luscious layers of creamy filling, buttery graham cracker crust, and the sweet-tart brilliance of cherry pie filling, this recipe is a feast for the senses. With our step-by-step guide, creating this masterpiece becomes a delightful experience, bringing warmth and nostalgia into your kitchen.
History / Fun Fact
This delightful dessert has a rich history, dating back to mid-20th century America, when no-bake desserts took center stage due to their ease and accessibility. Commonly featured on family gatherings, potlucks, and holiday celebrations, Vintage Cherries In the Snow epitomizes comfort food—a true reflection of the desire for something sweet and satisfying without the fuss of baking. The dessert gets its name from its light and fluffy cream layers, reminiscent of freshly fallen snow, while the cherries add a stunning pop of color, invoking images of sunny summer days. Over the years, this nostalgic dish has woven itself into the fabric of culinary celebrations, making it a beloved favorite across generations.
Ingredients
Creating Vintage Cherries In the Snow invites an array of sensory delights. Here’s what you’ll need for this dreamy dessert:
- 1 and 1/2 cups graham cracker crumbs: These fragrant crumbs form the foundation of your dessert, with a buttery undertone that will melt in your mouth.
- 1/4 cup granulated sugar: Fine and sparkling, it adds a touch of sweetness that balances the slightly salty crust.
- 1/2 cup unsalted butter, melted: The warm, creamy potion that binds your crust together, infusing a rich flavor throughout.
- 16 ounces cream cheese, softened: Creamy and luscious, this is the heart of your dessert, lending a smoothness that pairs beautifully with the cherries.
- 1 cup powdered sugar: Light and airy, it sweetens the cream cheese without any grit, creating an indulgent filling.
- 1 and 1/2 teaspoons vanilla extract: Aromatic and fragrant, this extract adds warmth and a hint of nostalgia to every bite.
- 1 cup heavy whipping cream: Heavenly and rich, it elevates the creaminess of your dessert, offering a luxurious mouthfeel.
- 1 can (21 ounces) cherry pie filling: Sweet, tart, and vibrantly colored, this topping is the pièce de résistance, providing a burst of fruity flavor.
Cooking Time & Tips For Vintage Cherries In the Snow
Preparing Vintage Cherries In the Snow can be done in two styles: a quick preparation for those tight on time or a meticulous slow approach for the culinary enthusiasts. Quick preparation requires mixing and assembling ingredients within an hour, yielding a dessert that can chill for four hours. However, for optimal flavor and texture, the slow preparation is ideal—allowing ample time for the flavors to meld together overnight often results in a richer, more decadent dessert.
Tips for Success:
- Ensure that your cream cheese is fully softened for a smooth filling—this prevents lumps.
- When whipping cream, chill your bowl and beaters to encourage peaks.
- Gently fold the whipped cream into the cream cheese mixture to keep the filling airy.
- Allow time for the dessert to chill; patience will enhance the flavors immensely!
Step-by-Step Directions
Cooking is an immersive experience, and with Vintage Cherries In the Snow, you’ll feel like you’re enveloped in a symphony of tastes and textures.
In a medium bowl, combine graham cracker crumbs, granulated sugar, and melted butter. Feel the sandy texture of the crumbs blend with the smoothness of the butter until it’s well combined. This mixture should represent a cohesive dough.
Take a 9"x13" dish and firmly press the crumb mixture into the bottom to form a solid crust. Hear the satisfying crunch as you shape the crust. Once set, place it in the refrigerator while preparing the filling.
Next, in a large bowl, beat the softened cream cheese, powdered sugar, and vanilla extract. Enjoy the transformation as this trio turns into a smooth and creamy delight.
In a separate bowl, whip the heavy cream until it reaches stiff peaks. Watch as your cream transforms into a fluffy cloud, almost too beautiful to incorporate!
Gently fold the whipped cream into the cream cheese mixture. Feel the airy textures dance together as you integrate them—this will give your dessert that fluffy, ethereal quality it’s known for.
Spread the creamy filling evenly over the chilled crust, smoothing it out gently.
Finally, spoon the cherry pie filling evenly over the cream layer. Resist the urge to swirl—it will be an explosion of flavor with each slice!
Cover your masterpiece and refrigerate for at least four hours—or for the best result, overnight.
When you’re ready to serve, slice into squares or rectangles, revealing the sumptuous layers within.
Serving Suggestions & Occasions
Vintage Cherries In the Snow is a versatile dessert that seamlessly fits into a multitude of occasions. It’s perfect as a showstopper at holiday gatherings, a sweet addition to birthday celebrations, or a nostalgic treat at family reunions. Serve it chilled, and consider garnishing with fresh cherries or mint leaves, which add an extra pop of color and a refreshing aroma.
Common Mistakes For Vintage Cherries In the Snow
Not Softening Cream Cheese: Be sure to let your cream cheese come to room temperature. Cold cream cheese leads to lumps in the filling.
Overmixing the Whipped Cream: Whipped cream can become grainy when overbeaten; stop as soon as stiff peaks form for optimal fluffiness.
Skipping the Chill Time: The flavors meld beautifully when given enough time in the fridge; patience is key to achieving the best texture!
Forgetting to Press the Crust: Ensure the crust is solidly pressed into the dish. A loose crust can crumble when slicing.
Healthier Alternatives & Variations
For those looking to make a lighter version of Vintage Cherries In the Snow, consider substituting low-fat cream cheese for regular cream cheese. You can also use Greek yogurt for a tangy flavor and an added protein boost. As for the crust, consider using whole-grain graham crackers or nut-based alternatives for a healthier twist.
If you desire different flavors, you can swap the cherry pie filling for fresh or frozen berries, such as blueberries or strawberries, creating a berry trifecta that is equally inviting.
FAQs
Can I use fresh cherries instead of pie filling?
Absolutely! Fresh or frozen cherries can be used for a more natural flavor, but you’ll want to add some sugar and cornstarch to thicken them.How long can Vintage Cherries In the Snow be stored?
This dessert can last for 3-4 days in the refrigerator, although it’s best enjoyed within the first two days.Can I make this dessert gluten-free?
Yes! Replace the graham cracker crumbs with gluten-free alternatives, and ensure that all other ingredients are certified gluten-free.Is it possible to freeze Vintage Cherries In the Snow?
Freezing is not recommended, as the cream filling may not maintain its texture once thawed.How can I make this dessert vegan?
Use dairy-free cream cheese and coconut cream in place of heavy cream, making sure all other ingredients are vegan-friendly.What should I do if my crust crumbles?
If your crust is too crumbly, you may need to add a touch more melted butter to help bind it together.
Conclusion
As you gather your ingredients and prepare to create Vintage Cherries In the Snow, envision the wave of delight that awaits you with each bite. The harmonious layers of creamy filling and vibrant cherry topping are sure to play a memorable part in your next family gathering or festive celebration. There’s no time like the present—embrace the whimsical nature of this no-bake classic. Create it today, and let the nostalgia bloom in every slice!
Print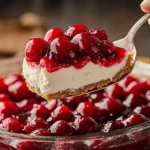
Vintage Cherries In the Snow
- Total Time: 240 minutes
- Yield: 12 servings 1x
- Diet: Vegetarian
Description
A delightful no-bake dessert with layers of creamy filling and cherry pie topping, evoking warmth and nostalgia.
Ingredients
- 1 and 1/2 cups graham cracker crumbs
- 1/4 cup granulated sugar
- 1/2 cup unsalted butter, melted
- 16 ounces cream cheese, softened
- 1 cup powdered sugar
- 1 and 1/2 teaspoons vanilla extract
- 1 cup heavy whipping cream
- 1 can (21 ounces) cherry pie filling
Instructions
- In a medium bowl, combine graham cracker crumbs, granulated sugar, and melted butter until well combined.
- Press the mixture into a 9″x13″ dish to form a solid crust and refrigerate while preparing the filling.
- In a large bowl, beat the softened cream cheese, powdered sugar, and vanilla extract until smooth.
- In a separate bowl, whip the heavy cream until it reaches stiff peaks.
- Gently fold the whipped cream into the cream cheese mixture until fully integrated.
- Spread the creamy filling evenly over the chilled crust.
- Spoon the cherry pie filling evenly over the cream layer without swirling.
- Cover and refrigerate for at least four hours, ideally overnight, to set.
- Slice into squares or rectangles to serve.
Notes
For a lighter version, substitute low-fat cream cheese and Greek yogurt. Ensure cream cheese is softened for a smooth filling.
- Prep Time: 30 minutes
- Cook Time: 0 minutes
- Category: Dessert
- Method: No-Bake
- Cuisine: American
Nutrition
- Serving Size: 1 serving
- Calories: 320
- Sugar: 25g
- Sodium: 200mg
- Fat: 22g
- Saturated Fat: 12g
- Unsaturated Fat: 8g
- Trans Fat: 0g
- Carbohydrates: 30g
- Fiber: 1g
- Protein: 4g
- Cholesterol: 60mg