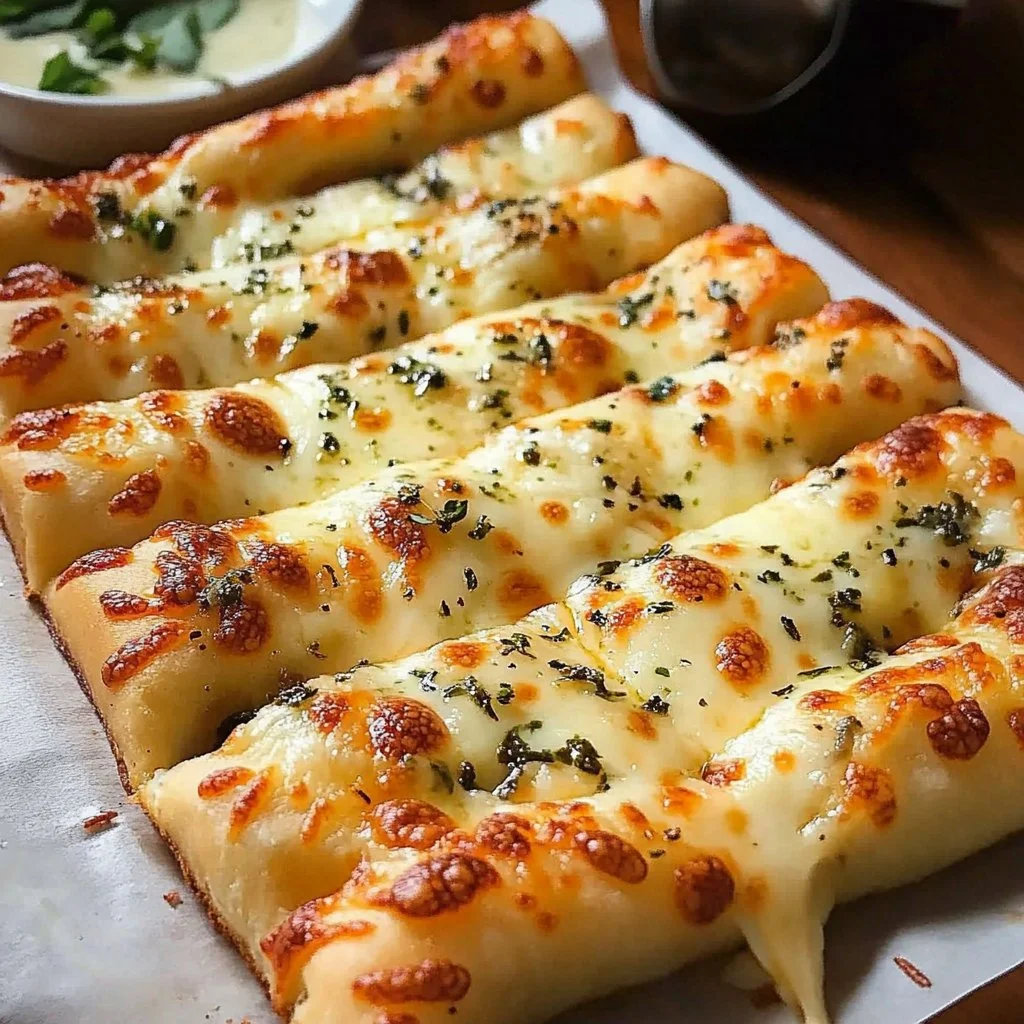
Melty Breadsticks: Comfort in Every Bite
There’s something undeniably heartwarming about pulling a tray of Melty Breadsticks out of the oven, their golden tops glistening with melted cheese and just a hint of garlicky goodness. These delightful treats are easy to whip up, bringing both nostalgia and joy to the table. Whether you’re looking for a quick snack, a side dish for your family dinner, or a party appetizer, these breadsticks will become a staple in your kitchen. The scent of freshly baked bread, mingling with the aroma of butter and herbs, envelops you like a warm hug, making it impossible to resist reaching for just one more.
So why not indulge in some cheesy bliss and make these Melty Breadsticks today? They’re not only quick to prepare but bound to leave your kitchen filled with warmth and your loved ones grinning from ear to ear.
What’s Your Ultimate Cheese Craving?
Have you ever found yourself standing in front of an open fridge, dreaming of that perfect cheesy snack? Maybe it’s a lazy evening, and the thought of crunchy, buttery breadsticks covered in gooey cheese sets your mouth watering. Imagine these Melty Breadsticks paired with your favorite marinara or ranch dip, the tantalizing combination of flavors sparking sheer bliss.
Every bite pulls you back to childhood dinners, where the joy of gooey cheese and soft bread was a treat in itself. Don’t you crave that comfort sometimes?
Why You’ll Love This Recipe
Quick and Easy Prep: Perfect for busy weeknights or last-minute gatherings.
Kid-Friendly Delight: These breadsticks are a surefire hit with children and adults alike, satisfying even the pickiest eaters.
Minimal Ingredients: Only a handful of items are required to achieve maximum flavor.
Customizable: Add jalapeños for a spicy kick or include basil pesto for an herby twist.
Ready to embark on a cheesy adventure? Let’s gather our ingredients and prep for a sensational experience!
Ingredients
Essential Components
Pizza Dough: Whether you choose a ready-made option or make your own, the base of our Melty Breadsticks is crucial. The dough serves as the canvas where all our lovely flavors will mingle.
Mozzarella Cheese: A whole block delivers the ultimate stretchiness and a creamy texture, inviting you to pull apart the soft, heavenly strips.
Parmesan Cheese: This sharp, flavorful cheese adds an additional layer of richness and savory depth, making each bite a little more indulgent and complex.
Salted Butter: A good quality butter is key here. It provides that lush, buttery taste we all adore while allowing the garlic to infuse the dough properly.
Garlic Cloves: Real garlic adds a zesty aroma and distinct flavor that elevates these breadsticks from great to absolutely unforgettable.
Italian Herb Mix: A blend of fragrant herbs enhances the overall flavor profile, tempting your taste buds with its aromatic bouquet.
Optional Additions: Consider adding sliced jalapeños for a spicy kick or a dollop of basil pesto for a fresh, herby essence.
Now that we have our ingredients ready, let’s talk about the timing involved in creating these scrumptious treats!
Timing
Fast and Indulgent vs. Slow and Luxurious
The best part about Melty Breadsticks is how quickly you can indulge in them. With a prep time of just 10-15 minutes and a baking time of 12-15 minutes, you could be enjoying hot, cheesy goodness within a mere half an hour.
However, if you’re in the mood for a slow and luxurious prep, why not take the extra time to make homemade pizza dough? This allows you to enjoy the calming process of kneading and waiting for it to rise—truly a labor of love.
But if you’re running short on time or simply want to satisfy a sudden craving, there’s no shame in using store-bought dough. The magic of these breadsticks lies in the melding of cheese and herbs, no matter how you get there!
Step-by-Step Guide
Your Path to Cheesy Perfection
Preheat Your Oven: Crank your oven up to 450°F to create that toasty environment perfect for baking.
Line a Baking Tray: Use parchment paper for easy cleanup and to prevent sticking.
Let the Dough Breathe: Allow your pizza dough to reach room temperature. This helps it roll out easier and achieve that perfect texture.
Shred the Cheeses: Using a grater, shred your mozzarella and Parmesan cheeses. The more, the merrier!
Melt Butter and Infuse: In a bowl, melt your quality butter and add minced garlic, letting it bask in the buttery goodness. Allowing it to sit briefly will intensify the flavor.
Roll Out the Dough: Spread your dough into a rectangle, about 1/4 inch thick, laying a foundation for cheesy goodness.
Brush with Garlic Butter: Generously brush your dough with the garlic-infused butter, making sure every corner is coated.
Sprinkle with Herbs: Dust the dough with Italian herbs, inviting their aromatic scent to the forefront.
Top with Cheeses: Layer on your shredded cheeses, letting them melt into the bread as it bakes.
Slice Carefully: Use a pizza cutter to slice the dough into strips, ensuring there’s space between each stick on the tray.
Bake to Perfection: Slide your tray into the oven and bake for 12-15 minutes, until your breadsticks are golden brown and irresistibly bubbly.
Cool and Serve: Allow them to cool slightly before serving, as patience yields a less molten cheese experience.
Nutritional Information
Indulge Responsibly
Each Melty Breadstick brings approximately 150 calories—a small price for the joy they deliver. Remember, it’s totally fine to indulge occasionally. Savoring these breadsticks is about enjoying the moment, and who can resist the heavenly combo of savory cheese and warm, pillowy bread?
Healthier Alternatives
Finding Balance in Flavor
If you want to indulge without the guilt, consider these healthier swaps:
Low-Sugar Pizza Dough: Look for whole-wheat or cauliflower-based dough options for a more nutritious base.
Dairy-Free Cheese: Use plant-based cheeses that melt well, offering a delicious alternative for those with dairy sensitivities.
Using Olive Oil: Swap butter for olive oil when brushing the dough, infusing a healthier fat option while keeping the flavor intact.
Serving Suggestions
Pairing Perfection
These Melty Breadsticks are incredibly versatile! Enjoy them as a standalone snack, or elevate your dining experience by serving them alongside:
A zesty marinara or ranch dip—perfect for those cheese pulls.
An ice cream dessert afterward to balance the savory notes with sweetness.
At holiday gatherings or family dinners as a delightful appeaser before the main event, adding a warm, comforting touch.
Common Mistakes
Avoiding Pitfalls
To ensure your Melty Breadsticks turn out perfectly, watch out for these common mistakes:
Overbaking: Keep an eye on your breadsticks. Once they’re golden and bubbly, pull them out to avoid a dry texture.
Dough Thickness: Rolling the dough too thin can lead to crispy breadsticks rather than soft, chewy ones.
Messy Experiences: Slice carefully and use parchment paper to prevent a chaotic mess when transferring to your baking tray.
Storing Tips
Keeping the Magic Alive
Here’s how to keep your delicious Melty Breadsticks fresh and exciting:
Freezing Portions: Allow the breadsticks to cool completely, then freeze them in an airtight container for up to three months.
Reheating Instructions: Reheat in the oven at 375°F for about 5-10 minutes until they’re warmed through and cheese is melty again.
Tempted to Bake Your Own?
You can practically taste the gooey goodness through the screen! There’s no denying the indulgent pleasure these Melty Breadsticks offer. So why wait? Gather your ingredients, roll up those sleeves, and create the warmth and comfort of homemade goodness in your kitchen. Your friends and family will thank you, and you might even find yourself sneaking back for a midnight snack!
FAQs
1. Can I use gluten-free dough?
Absolutely! Substitute with a gluten-free pizza dough and enjoy the deliciousness without gluten.
2. How can I make these breadsticks spicier?
Simply add sliced jalapeños or some crushed red pepper flakes to the cheese layer before baking.
3. Can I store leftover breadsticks?
Sure! Store them in an airtight container in the fridge for up to three days. Reheat to enjoy.
4. How do I make garlic butter from scratch?
Melt butter and add minced garlic directly to create the perfect blend, or adjust to your taste.
5. Can I use different herbs?
Of course! Feel free to experiment with different herbs like rosemary or thyme for unique flavor profiles.
Take a leap and gather the ingredients to craft these irresistible Melty Breadsticks. Your taste buds will thank you!
Print
Melty Breadsticks
- Total Time: 30 minutes
- Yield: 4 servings 1x
- Diet: Vegetarian
Description
Indulge in heartwarming Melty Breadsticks topped with gooey cheese and garlic, perfect as a snack, side dish, or appetizer.
Ingredients
- 1 package Pizza Dough
- 8 oz Mozzarella Cheese
- 4 oz Parmesan Cheese
- 4 tbsp Salted Butter
- 2 Garlic Cloves, minced
- 1 tbsp Italian Herb Mix
- Optional: Sliced jalapeños or basil pesto
Instructions
- Preheat your oven to 450°F (232°C).
- Line a baking tray with parchment paper.
- Let the pizza dough reach room temperature.
- Shred the mozzarella and Parmesan cheeses.
- Melt the butter in a bowl and add minced garlic, infusing the flavor.
- Roll out the dough into a rectangle, about 1/4 inch thick.
- Brush the dough generously with the garlic butter.
- Sprinkle the Italian herb mix over the dough.
- Top with shredded cheeses.
- Slice the dough into strips using a pizza cutter.
- Bake in the oven for 12-15 minutes until golden brown and bubbly.
- Cool slightly before serving.
Notes
Store leftovers in an airtight container in the fridge for up to three days. Reheat to enjoy.
- Prep Time: 15 minutes
- Cook Time: 15 minutes
- Category: Appetizer
- Method: Baking
- Cuisine: Italian
Nutrition
- Serving Size: 2 breadsticks
- Calories: 150
- Sugar: 1g
- Sodium: 200mg
- Fat: 9g
- Saturated Fat: 5g
- Unsaturated Fat: 3g
- Trans Fat: 0g
- Carbohydrates: 14g
- Fiber: 1g
- Protein: 6g
- Cholesterol: 20mg